Last modified: March 10, 2026
In this lab, you will kick-start your Lode Runner project
by creating the basic components of the game: MyWorld, Platform, and Player.
Please download the demo for this lab here.
You will need to use the images under the "/images" folder.
Direct link to the latest images with updated player heights.
(optional) To make your game look and sound like the original,
you can download and use the complete Lode Runner Visual and Sound Library here.
Logging Your Progress
Since this is a large project with many parts, you will need to log your progress in a journal so you can get credit for the work you do. Rather than grading you on completion of each assignment, you will work on making progress each day and will be graded on your development journal and code development. You will be expected to make progress each time an assignment is assigned even if your work is going toward fixing an earlier stage. You should always submit your latest code and the google doc link to the latest assignment before the due date to get credit for an on-time submission.
- Make a copy of the Development Journal Template
- Set the sharing settings to anyone with the link
- Name the document in the format
PX_LastName_FirstName_LodeRunner_Journal
- You will submit a link to this document in the comment section when you submit your code.
- When you work on Lode Runner, you will log your work time in the Development Log section and update the status of the assignments to indicate what is working and what issues you are running into.
Change the constructor in MyWorld so the world has dimensions 600 X 480. This will make the grid system for the walls fit perfectly inside the world. Each grid will be the size of the width of a wall which goes evenly into 600 and 480.
Set the background image of your MyWorld to an image filled with black using the method setBackground(GreenfootImage image). Here is how you can make such an image:
- Create a GreenfootImage with the same width and height as the world
- Set the drawing color to Color.BLACK
- use fillRect(x, y, width, height) to fill the image with black
Next create a Wall class and set the image to the bricks.png image from the starter code.
Create a method that draws a row of walls. The method should take parameters for the number of walls in the row and the position of the row.
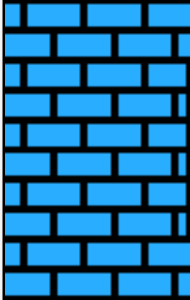
Create a method that draws walls in a rectangular grid. The method should take the number of walls in each row, the number of rows, and the position of the grid. Each wall should be centered in a grid square with side lengths equal to the width of a wall. Note that the height of the wall is less than the width, so this will create a small gap between rows which will make the rows fit together seamlessly as shown in the picture below.
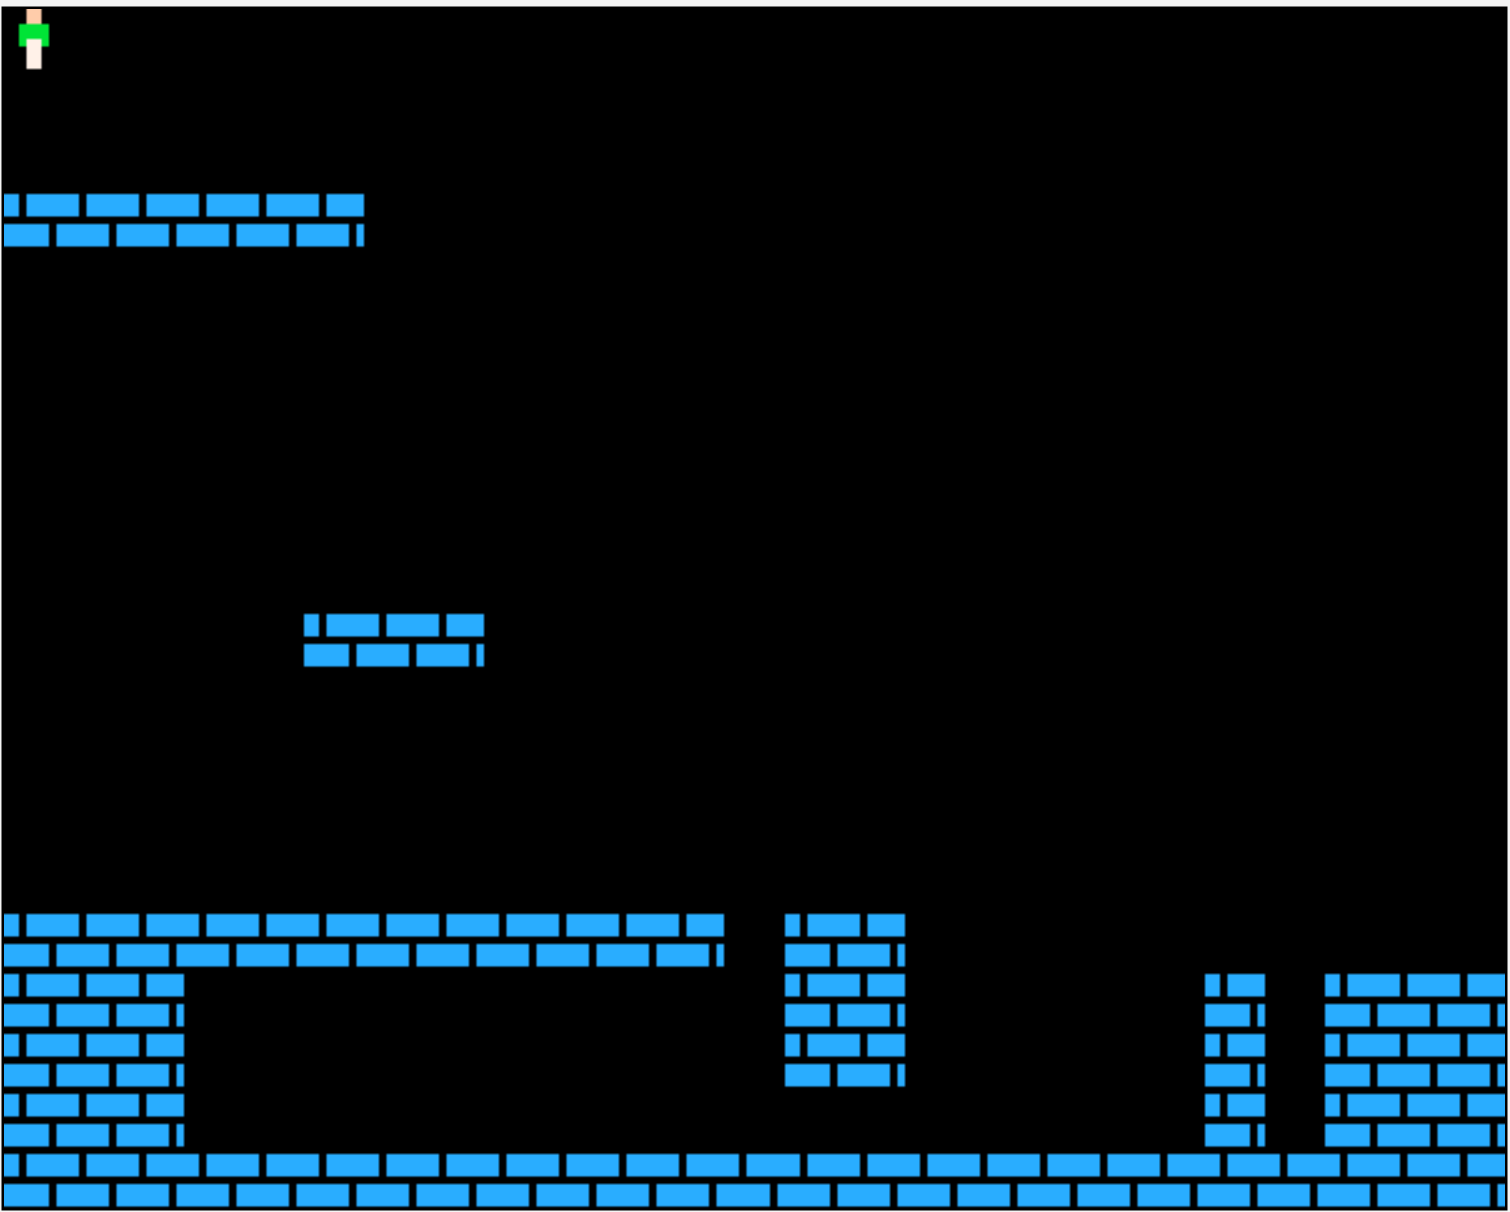
Use the methods to draw some platforms as shown below:
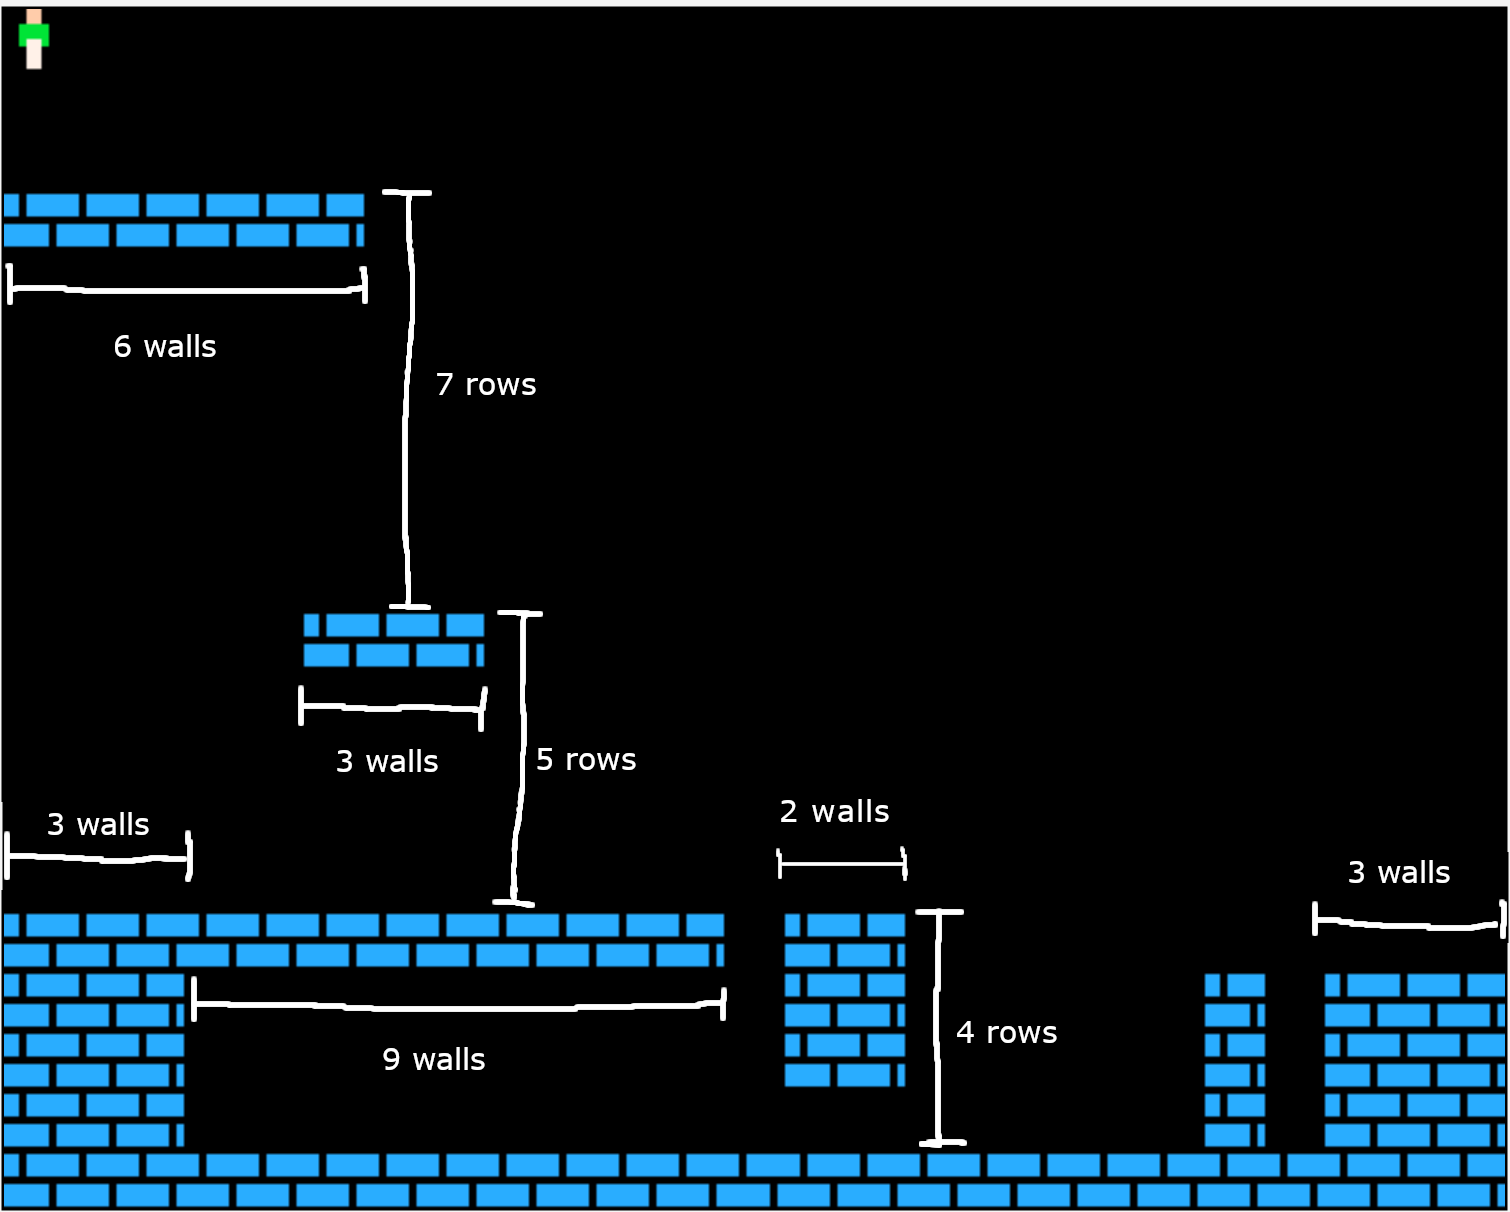
Here is another picture with labels showing how many rows are between the platforms and how many walls are in each row.
Create the Player
Create a player class with the following behaviors:
When the player is on a platform:
- While the left or right arrow is pressed, the player moves in the corresponding direction.
- While moving left or right, the player's image changes to show the run animation.
- The player should never move into world edges or into walls.
When the player walks off a platform and falls:
- The player moves down to fall at a rate of 3 cells per frame.
- While falling, the player should show the falling image.
- While falling, the player should not be able to move left or right.
- A falling player stops when landing on a platform again.
Finally, add a player to the world as shown in the picture above.
Animation Tips
- Basic idea for animation: Use an instance variable to keep track of the frame count. Every time the player moves, change the actor's image to the next image, cycling back to the first image after the last image.
- Keeping a list of file names: Keep a List of Strings to store the image filenames. Then keep track of which index you are on, cycling back to index 0 after the last index.
- Alternative: Because image filenames end in
000, 001, 002, 003, ...etc., you can also build a String that matches the filename you need based on the frame number.
- Advanced animation: To make the animation slower, you can keep track of how many times the player has moved and only increase the image frame every 3 moves.
Methods For Detecting Walls
Think about how you want to detect collisions. There are multiple methods that can be useful for gathering different types of information.
isTouching(Wall.class) will return true if ANY part of the wall image touches ANY part of the player image.getOneIntersectingObject(Wall.class) will return a reference to a wall the player is touching or null if the player is not touching a wallgetOneObjectAtOffset(dx, dy, Wall.class) will detect a wall that contains the point (getX() + dx, getY() + dy). Note that the getX() and getY() are already included, so you should ONLY pass the amount you want to offset from the center of the player.
Examples for getOneObjectAtOffset(dx, dy, Wall.class):
- If you were to pass half the player width for dx and half the player height for dy, that would return true if a wall contained the bottom right corner of the player.
- If you wanted to check for a wall to the right of the player, your dx should be half the player width PLUS the amount you want to look to the right.
Note that if you are using getOneObjectAtOffset(dx, dy, Wall.class) to find out if a wall is below/left/right/above the player, you should use more than one collision point. For example, to check if a wall is below the player, you should check points on the left and right side below the bottom edge. You can also check below the middle of the bottom edge, but you can't only check the middle because then your player will fall off edges prematurely. It is also best if you use offsets based on the width of a brick rather than the width of a player so the varying player image widths will not cause you player to fall through the edge of a wall. In particular, i recommend the left and right points be offset by dx values one pixel less than the width of a brick and the dy values be one pixel more than the player height.
Here is a picture with red dots marking suggested collision detection points:

Making Helper Methods
You should create helper methods that answer questions about the player's immediate surroundings. There are some ideas for helper methods below. You may use only some of these for now and may add more when you work on adding other game features such as ladders. Since all of these methods are asking a yes/no question, they each should return a boolean.
- Is the player touching a wall?
- Is there a wall one step below/above the player?
- Is there a wall one step to the right/left of the player?
- Is there a wall touching the left/right edge of the player?
- Is the player past the left/right/bottom/top edge of the world?
- Should the player fall?
- Can the player step left/right without ending up in a wall or edge?
Collision Tips
- RULE ONE: At the end of the act() method, the player should never be touching a wall.
- When falling, if the player is touching a wall after moving down, move them back up one pixel at a time until they are not touching a wall. There are several variations on this general strategy. Here are a couple variations:
- Move one pixel down (up to a maximum of 3) as long as the player would not end touching a wall after the move
- Move one pixel down (up to a maximum of 3) until the player is touching a wall. If they are touching a wall after the loop, move then back up one pixel.
- When finding out if the player can step left/right, you should save the original image and position, then change the player image to the next run frame before doing collision checks. When done, if the player couldn't move successfully, restore their original position and image. This ensures that the player will not run into a wall simply because the next run image is wider. Note that sometimes simply changing the image will cause the player to be in the wall behind them because the new image is wider than the original. In that case, you need to get the player out of the wall behind them before checking for walls ahead of them. Hint: You can use getOneObjectAtOffset to check for walls along the player's back edge.
- It could also be a good idea to temporarily change the image of the player to the fall image every whenever checking colisions because the fall image is the widest image. This makes collision checks consistent so changing images will not change the collisions status. First save the original image in a local variable, then change the image to the fall image. Collect the collision status and finally change the image back to the original image. The one downside of this is the player will not be able to approach as closely to the wall when their image has smaller width than the fall image, but that is only a very minor detail that will not even be noticed by users.
Submission
Zip your entire project folder and submit it below.
- Name your project folder
PX_LastName_FirstName_LodeRunner.
- Right click on your project folder and Send To -> Compressed (zipped) folder. On a mac compressing is similar, using a right click, but has a slightly different option.
- You should end up with a zip file named
PX_LastName_FirstName_LodeRunner.zip. For example if you were in 3rd period and named Michael Wang, then you would name the file P3_Wang_Michael_LodeRunner.zip
- Make sure your Google Doc is viewable by "anyone with the link" and is Editable by your teacher. This is so your teacher and TAs can give you credit for your work.
- Paste the link to your Google Doc in the Submission Comments section on this submission form (which becomes visible after you enter a file to submit)
You must Sign In to submit to this assignment