Last modified: March 28, 2023
Lode Runner HW 6 Create Enemies
In this lab, you will add enemies to your Lode Runner game
who chase the closest player available, whether it's Player or MousePlayer.
The enemies will walk, climb up ladders, and bars
just like how your players move around.
To avoid writing repeated code, you can take advantage of Java inheritance.
Creating the Person Class
In the previous lab, you made two player classes,
where one class inherited the movement code from the other.
In this lab, you will be creating an Enemy class that will follow the player just like the mouse player followed the mouse.
Since you need to get a reference to the player, it is important to get a list of Player objects in the world.
However, if you make Enemy a subclass of Player, then calling getWorld().getObjects(Player.class)
will return a list of Players and Enemies since Enemy extends the Player class and is a kind of Player.
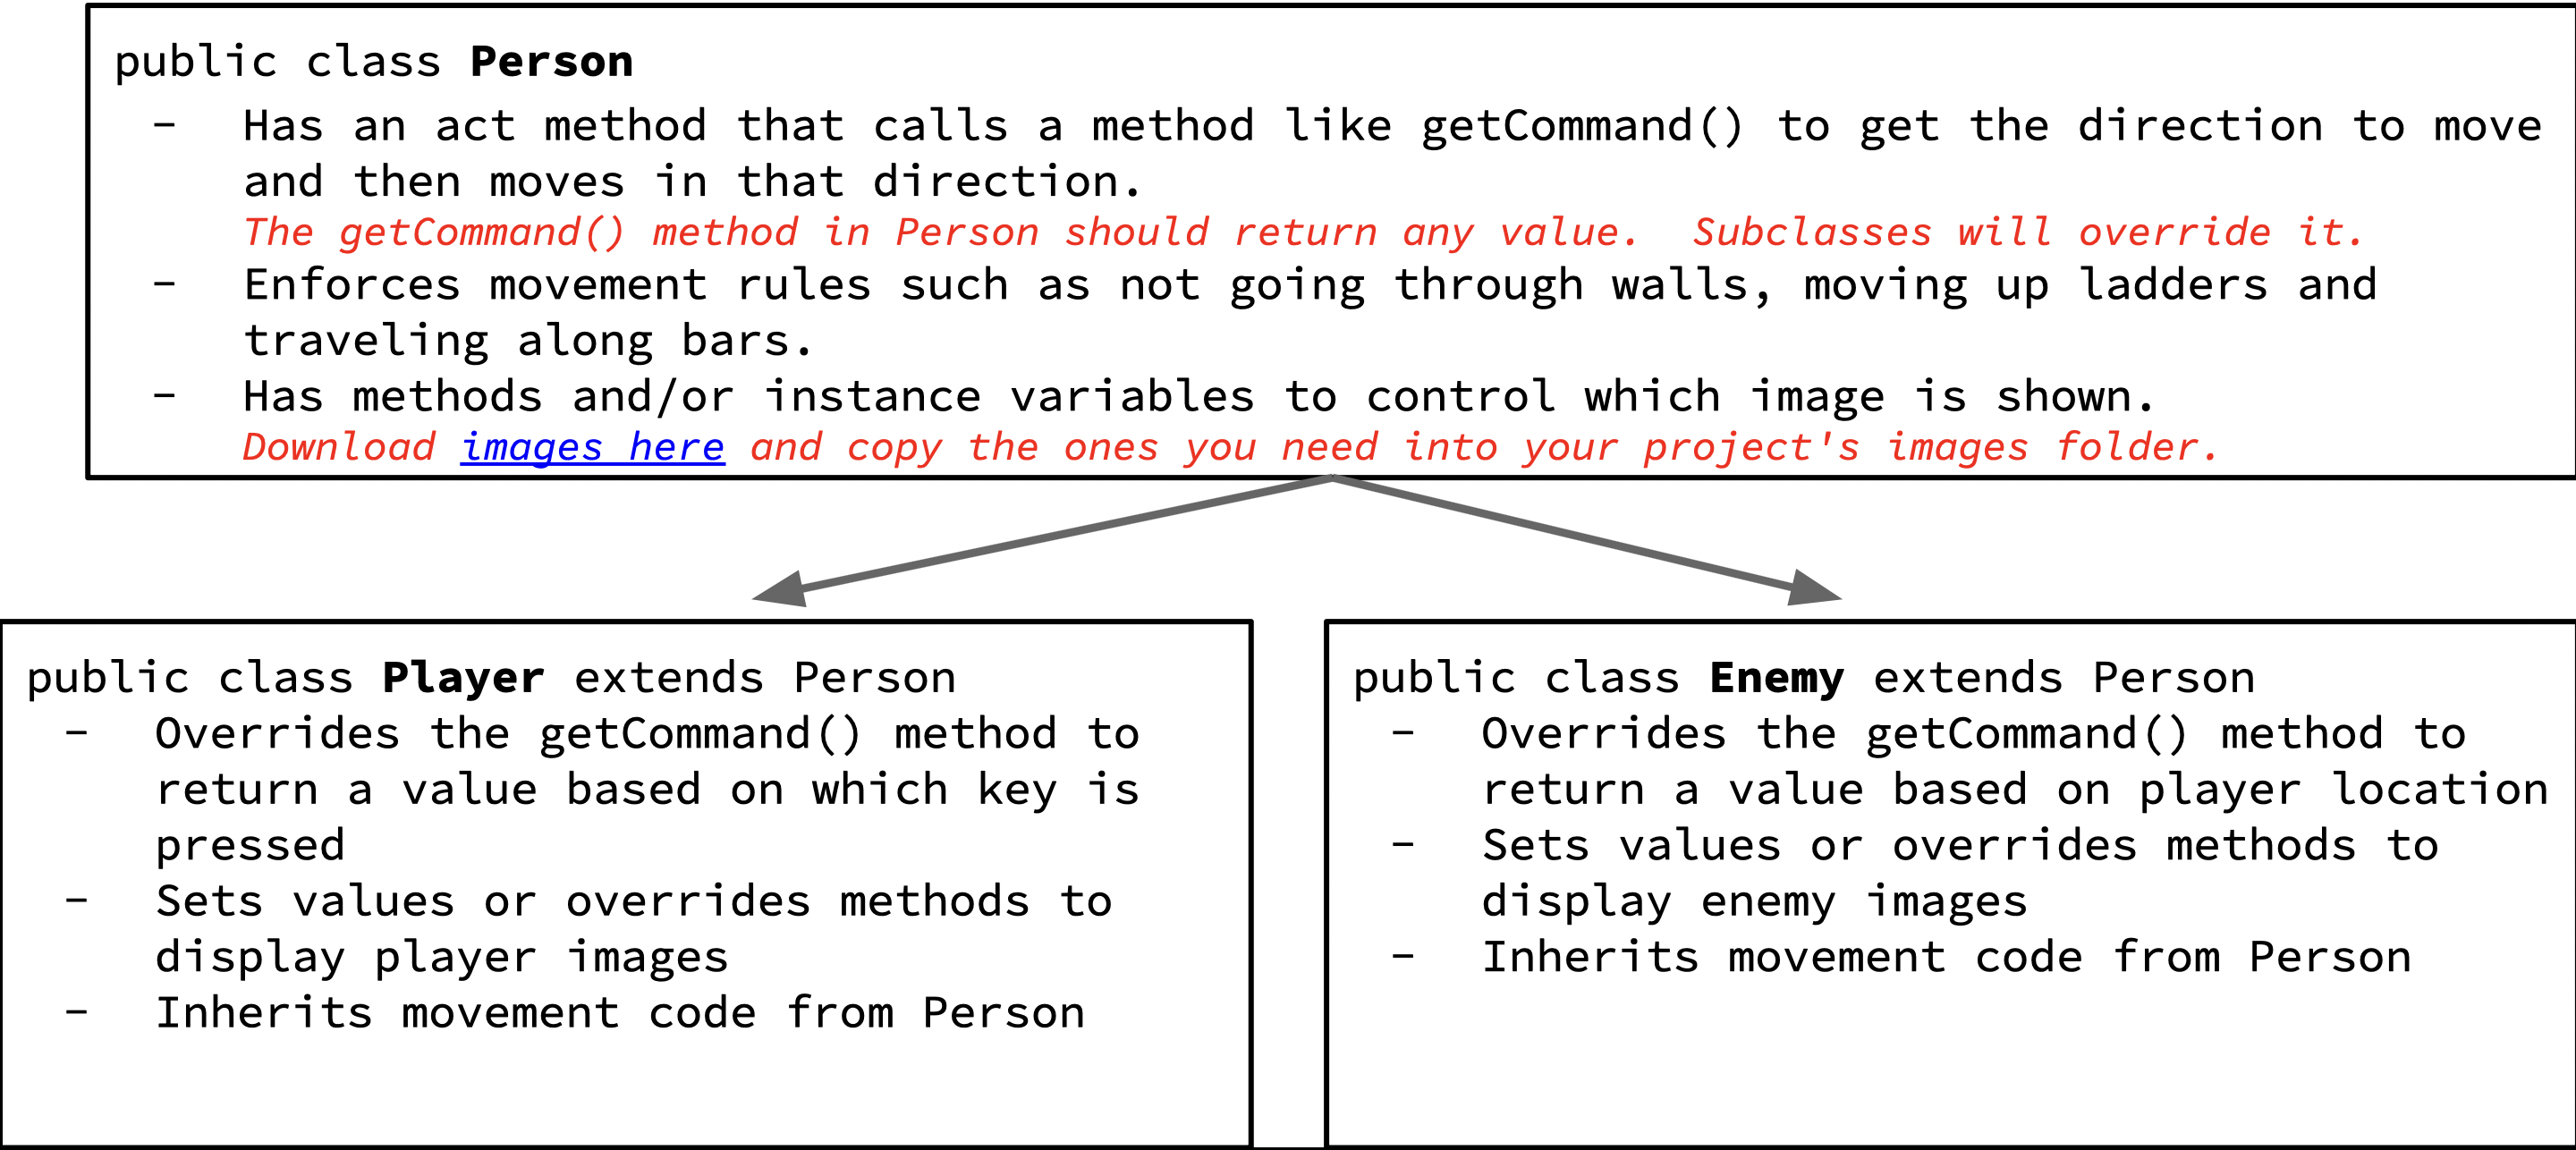
In order to get a list of Player-only objects in the world, we can create a general Person class
that represents all objects that move around like a person in the world.
The Person class should have all the movement code and the Player and Enemy classes should both extend Person.
The Player class should override the getCommand() method to return the direction indicated by the keyboard input
and the Enemy class should override the getCommand() method to return the direction that is toward the location of the player,
just like the mouse player moved toward the location of the mouse.
Creating the actual Enemy
Now, you can create the actual enemies.
Create an enemy class that follows the closest player available,
whether it's Player or MousePlayer.
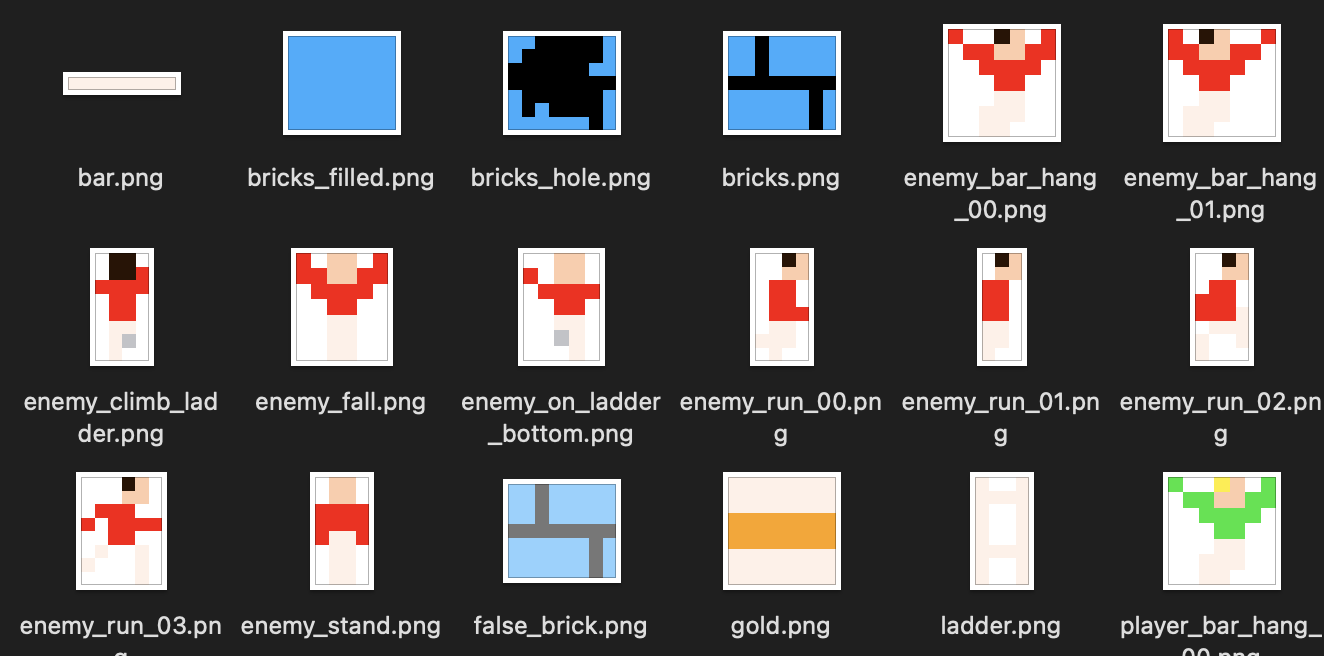
Give it an appropriate image, size, and movement animation.
See the "images" folder.
Class Hierarchy
(Optional) Optimizations
Would be nice if your enemies were smarter and did not get caught on walls as often.
Can you think of ways to make them smarter?
What can they do to find the player more consistently?
For now, you do not need to keep track of player's lives
nor reduce life when an enemy hits a player.
Submission
Zip your entire project folder and submit it below.
- Name your project folder
PX_LastName_FirstName_LodeRunner.
- Right click on your project folder and Send To -> Compressed (zipped) folder. On a mac compressing is similar, using a right click, but has a slightly different option.
- You should end up with a zip file named
PX_LastName_FirstName_LodeRunner.zip. For example if you were in 3rd period and named Michael Wang, then you would name the file P3_Wang_Michael_LodeRunner.zip
- Make sure your Google Doc has Editing permissions for "anyone with the link". This is for your teacher and TAs.
- Paste the link to your Google Doc in the Submission Comments section on this submission form (which becomes visible after you enter a file to submit)
You must Sign In to submit to this assignment