Last modified: May 14, 2025
Image Lab HW 1 - Set Up
Have you ever wondered how Photoshop filters work?
In this lab, you will write image filters for a Java program called ImageLab.
Here are some filter examples.


If you have actual adobe Photoshop on your laptop,
find an random image using Google image search
and open the image in Photoshop.
Experiment with the different filters available in the Filter menu.
Setup
First, download the template for this lab here.
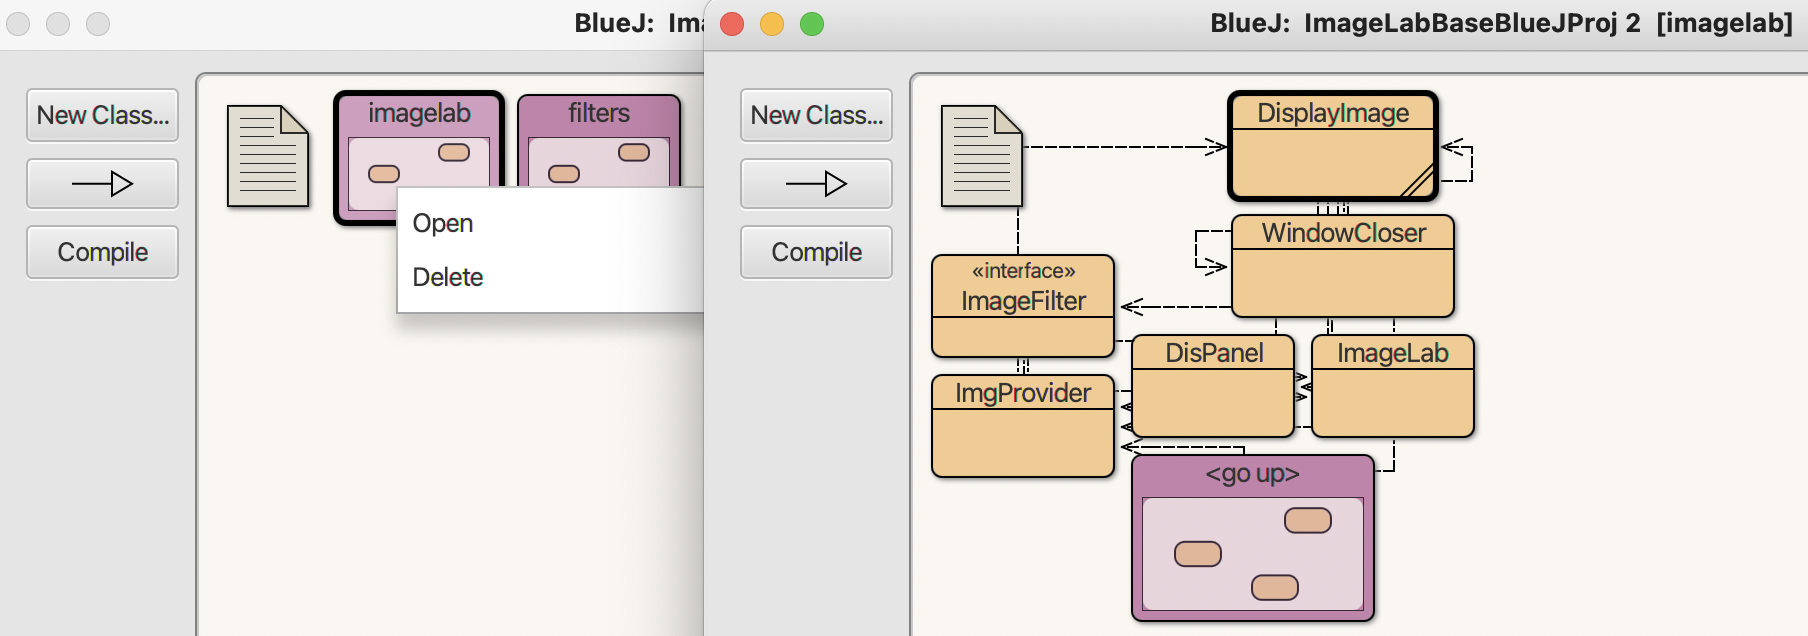
Unzip the downloaded file. Then, click on "package.bluej" to open it.
Double-click the "imagelab" purple box, which will open another window with more yellow boxes.
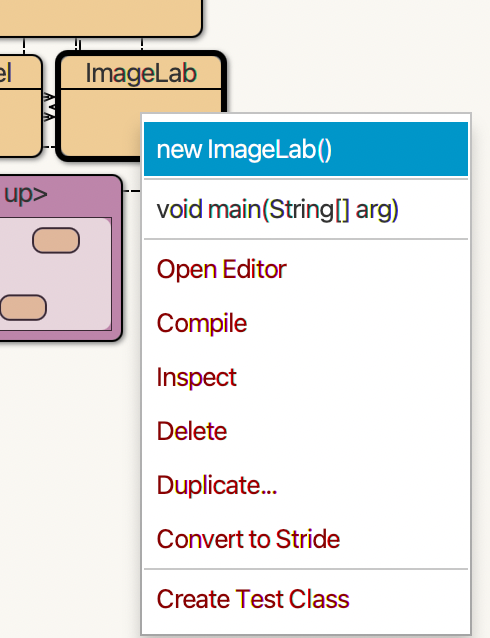
On the newly opened window, right-click the "ImageLab" yellowbox and call its void main(String[] args) method.
Using the Downloaded ImageLab
After clicking void main(String[] args), a tiny window like this will open:
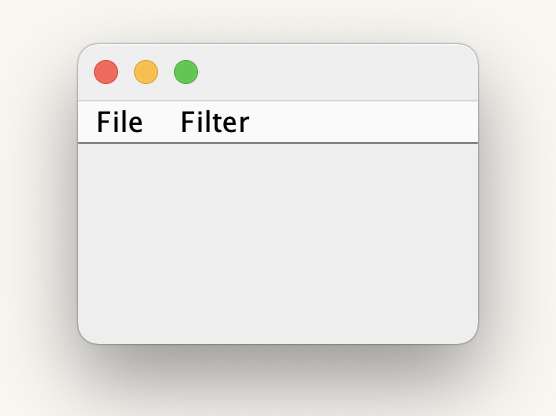
Choose File | Open and find an image. B&W and Color sample images are provided in the "imagelab/images" folder.
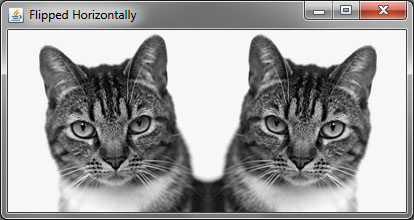
After you have an image open you can choose a filter. Choose Filter | Horizontal Flip (BW).
You should see a second image window pop up that is the B&W horizontal flip of the original image. For now, we will work in B&W to keep things simple.
How does the Filter Code Work
The full source code for ImageLab is provided and you are free to look at it and modify it, however don't worry about understanding all of it. You are responsible only for understanding how to make filter plugins for ImageLab.
Here is an outline of an image filter for ImageLab:
// File:  DemoFilter.java

package filters;
import imagelab.*;

public class DemoFilter implements ImageFilter {

    ImgProvider filteredImage;

    public void filter (ImgProvider ip) {
        // Add pixel manipulation code here
    }

    public ImgProvider getImgProvider() {
        return filteredImage;
    }

    public String getMenuLabel() {
        return "DemoFilter";
    }
}
Code Explanation:
Line 3: Packages link files together in Java. This line tells Java that this file is in a folder named "filters" and that it is linked to other files in the filters package.
Line 4: Import all the classes in the imagelab library (folder)
Line 6: ImageLab filters must implement the ImageFilter interface. Open ImageFilter.java and look at the code. Do you notice anything different from a normal class? Instead of saying
it says
public interface ImageFilter
This file is an interface instead of a class. An Interface in Java is a list of methods that other classes must include in order to implement the Interface. It is a guarantee that different parts of a program will be able to work together because they all use the same methods specified by the interface. Therefore, when line 6 of DemoFilter.java says it implements the ImageFilter interface, it is a promise that DemoFilter will include the three methods listed in the ImageFilter interface.
Line 8: An attribute to hold the modified image
Line 10: All your code that manipulates the image will go here. This is one of the interface methods.
Line 14: You don't need to do anything with this method. It just returns the attribute and is required to be compatible with the ImageFilter interface.
Line 18: You should change the String to whatever you want users to see when they select your filter from the Filter menu in ImageLab. This is the last method required by the ImageFilter interface.
The ImageProvider API
Most of the work you will need to do in order to write a filter will be done using the ImageProvider class. Here is the API for ImageProvider.
| Constructor Summary |
ImgProvider()
Default constructor to create a blank image |
ImgProvider(java.lang.String name)
Constructor to create an image from a given file |
| Method Summary |
| short[][] |
getAlpha()
Returns a 2D array of transparency values for this image. Each value is between 0 and 255. |
| short[][] |
getBlue()
Returns a 2D array of Blue values for this image. Each value is between 0 and 255. |
| short[][] |
getBWImage()
Returns a 2D array of grayscale values for this image. Each value is between 0 and 255. |
| short[][] |
getGreen()
Returns a 2D array of Green values for this image. Each value is between 0 and 255. |
| short[][] |
getRed()
Returns a 2D array of Red values for this image. Each value is between 0 and 255. |
| void |
readinImage()
Changes the image to the information stored in a 2D array. |
| void |
setBWImage(short[][] img)
Sets the image to the information stored in a 2D array. |
| void |
setColors(short[][] rd, short[][] g, short[][] b, short[][] al)
Sets the image to the information stored in each 2D color array. |
| void |
showPix(java.lang.String name)
Displays the filtered image in a new window using the given String as the window title |
Filter Example
Here is code for the demo filter that flips an image horizontally. Read through the code to understand what's going on.
// File HFlipBW.java
package filters;
import imagelab.*;

public class HFlipBW implements ImageFilter {

    // Attribute to store the modified image
    ImgProvider filteredImage;

    public void filter (ImgProvider ip) {

        // Grab the pixel information and put it into a 2D array
        short[][] im = ip.getBWImage();

        // Make variables for image height and width
        int height = im.length;
        int width  = im[0].length;

        // Create a new array to store the modified image
        short[][] newImage = new short[height][width];

        // Loop through the original image and store the modified
        // version in the newImage array
        for (int row = 0; row < height; row++) {
            for (int col = 0; col < width; col++) {
                // flips the image horizontally by reversing the column direction
                newImage[row][col] = im[row][(width - 1) - col];
            }
        }

        // Create a new ImgProvider and set the filtered image to our new image
        filteredImage = new ImgProvider();
        filteredImage.setBWImage(newImage);

        // Show the new image in a new window with title "Flipped Horizontally"
        filteredImage.showPix("Flipped Horizontally");
    }

    public ImgProvider getImgProvider() {
        return filteredImage;
    }

    // This is what users see in the Filter menu
    public String getMenuLabel() {
        return "Horizontal Flip (BW)";
    }

}
Code explanation:
- The heart of the code is in the
filter() method beginning on line 10. When the user selects a Filter in the ImageLab program, the filter() method is automatically called and receives an ImageProvider in its parameter list. The ImageProvider parameter contains all the information about the image you need in order to create a modified version of the image.
- The idea is to grab pixel information from the original image and create a modified version of the image using some kind of filtering technique. A filter might modify pixel color or transform the pixels into a different configuration, such as flipping, rotating, or creating a ripple effect.
- Lines 24 to 27 loop through each row and column of the original image and creates a new image that is the horizontal flip of the original.
- Once a new image array has been created, the filtered image must be set to the new array. Line 33 does this.
Create Your Own Filter
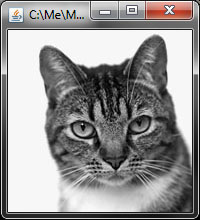
Let's create a new image filter that takes an image like the cat shown at left and adds a reflected counterpart as shown on the right.
- First, duplicate the demo filter HFlipBW.java and change the class name using the convention
PX_LastName_FirstName_DoubleImageBW. You can duplicate a class in BlueJ by right clicking on the class and choosing Duplicate...
- Our idea is to create a new image that's twice as wide as the original, so modify the code that makes the new array so the new array is twice the width of the original.
- Now modify the code to put the normal copy of the image on the left side and a flipped copy on the right side. There are two main approaches:
For each (row, col) in the new image:
    if (row, col) is on the left side
        // set the value at (row, col) to the
        // corresponding value in the original
        newImage[row][col] = im[___][___];
    else
        // set the value at (row, col) to the
        // horizontally flipped value in the original
        newImage[row][col] = im[___][___];
OR
For each (row, col) in the original:
    // place one copy of the value on the left side
    // in the corresponding position
    newImage[___][___] = im[row][col];
    // place another copy of the value on the right side,
    // but in the horizontally flipped position
    newImage[___][___] = im[row][col];
- Change the title of the image to Double Image:
filteredImage.showPix("Doubled Image");
- Change the getMenuLabel() method to return
"Double Image (BW)"
- Compile the filter, run the project, and try it out!
Submission
Name your filter class using the convention PX_LastName_FirstName_DoubleImageBW. For example if you were in 3rd period and named Michael Wang, then you would name the class P3_Wang_Michael_DoubleImageBW. This should create a file in the filters folder of your project named P3_Wang_Michael_DoubleImageBW.java, which is the file you should upload here.
You must Sign In to submit to this assignment