Last modified: May 21, 2023
Image Lab HW 4 - Image Filters Review
Instructions
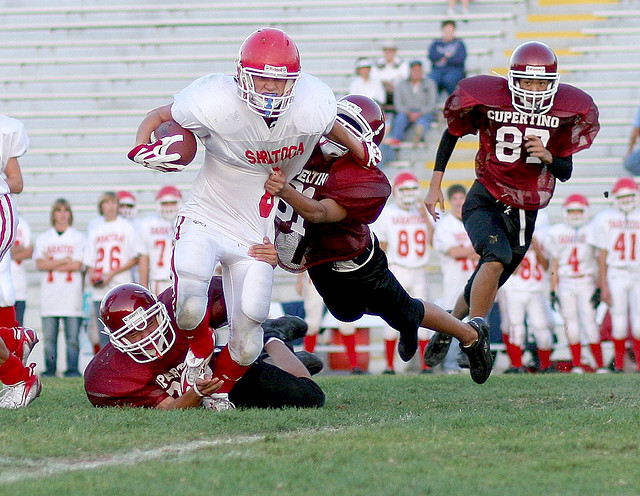
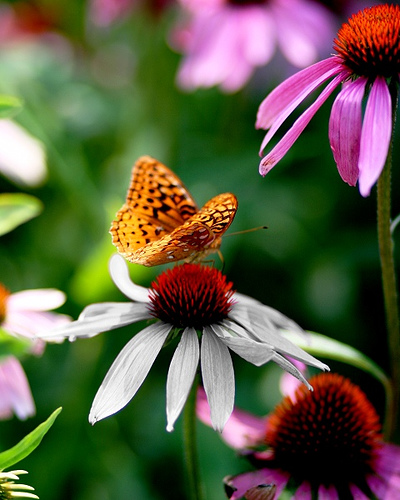
Original image:

┌────────────┬─ width (W) ─┬────────────┐
│            │             │            │
│            │             │            │
│            │             │            │
│ section A  │  section B  │ section C  │
│            │             │            │
│            │             │            │
│            │             │            │
└────────────┴─────────────┴────────────┘

New image:

┌────── W/3 ─┬──── W/3 ────┬───── W/3 ──┬─────── W/2 ──────┐
│            │             │            │                  │
│            │             │            │                  │
│            │             │            │                  │
│ section A  │  section B  │ section C  │ section D (new)  │
│            │             │            │                  │
│            │             │            │                  │
│            │             │            │                  │
└────────────┴─────────────┴────────────┴──────────────────┘
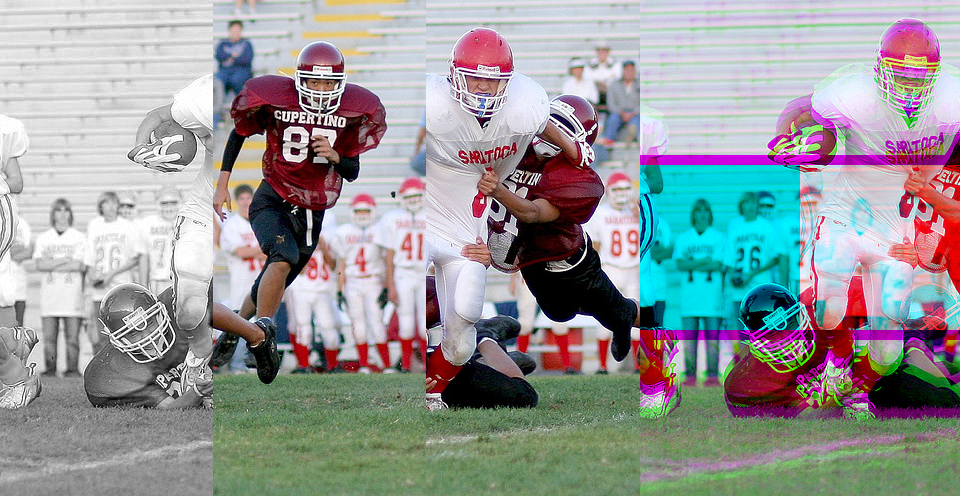
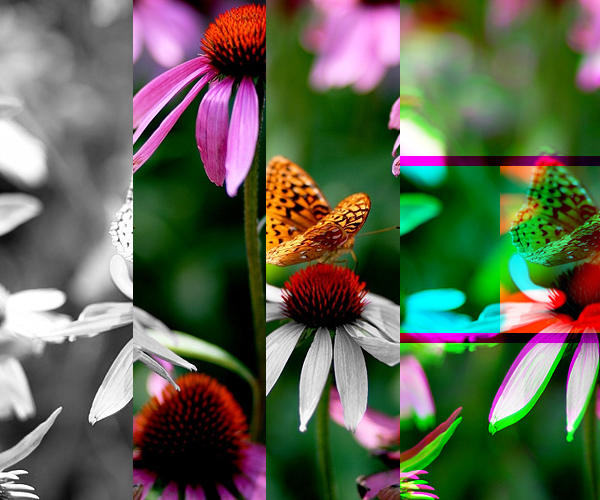
In the pixels that correspond to the first third of the original image (section A), set all color values to the highest color value at that pixel.(i.e. if a pixel at a certain row and col has values red = 65, green = 134, and blue = 201, then set the red, green and blue values all to 201 at that pixel)
switch the pixels that correspond to the 2nd and 3rd thirds of the original image (i.e. switch sections B and C.
In section D of the new image repeat the left half of the image but with the following modifications:
In the bottom third of section D, shift all the green values down 10 pixels (pixels at the top of the bottom third will thus not have any green value assigned to them so they will effectively have green = 0).
In the top third of section D, shift all the green values up 10 pixels (similar to what you did in the bottom third).
In the middle third of section D, shift all red values right by half the width of section D (recall that section D is itself half the width of the original).
Leave alpha values the same as the original everywhere
Examples
Look below to see examples of what the filter looks like on two different images:
Look below to see examples of what the filter looks like on two different images:
Before:
After:
Before:
After:
Submission
Name your filter class using the convention PX_LastName_FirstName_PracticeFilter. For example if you were in 3rd period and named Michael Wang, then you would name the class P3_Wang_Michael_PracticeFilter. This should create a file in the filters folder of your project named P3_Wang_Michael_PracticeFilter.java, which is the file you should upload here.
You must Sign In to submit to this assignment