Last modified: May 18, 2023
Image Lab HW 2 - B&W Filters
Before starting this lab make sure you have completed Image Lab: Setup
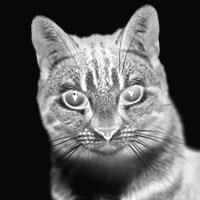
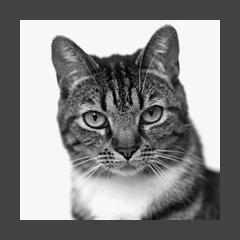
You should also know that in an image, the pixel values range from 0 (black) to 255 (white).
Note: In the following instruction, "monochrome", "black and white", "B & W" will be used interchangeably.
In this lab, you will create three custom image filters for the ImageLab.
You may choose among the options below or you may come up with a filter idea of your own.
Bronze Filter Options
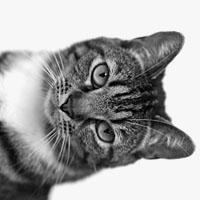
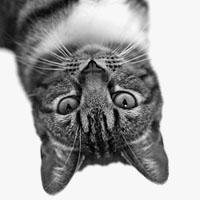
Vertical Flip (B&W)
Flip the image vertically. The solution will be similar to the horizontal flip shown in Image Lab: Setup.
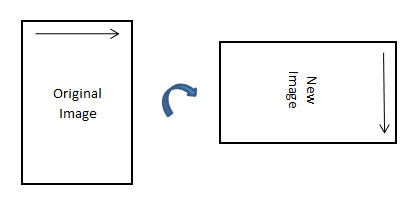
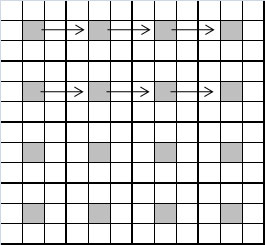
Rotate 90 Degrees (B&W)


Rotating 90 degrees takes two steps: (1) Create a new image array that is the opposite of the original, meaning that width and height are interchanged. (2) Inside the double for-loop, store pixels in the proper order to get the rotated result.
Use the diagram below to visualize the right order to store pixels. Each column of the original image becomes a row in the new image. Additionally, note that the top row of the original becomes the last column of the new image.
Make sure to test your filter on a non-square image.
Make sure your rotated image is not a reflected version of the original.
Rotate 180 Degrees (B&W)
Similar to Rotate 90 except the width and height are not transposed. If you write this filter, make sure your final image is actually rotated and not a vertical reflection.
Horizontal Half Reflection (B&W)
Reflect the left half of the image onto the right half. Here's an example:
Vertical Half Reflection (B&W)
Same idea as Horizontal Half Reflection. You may not choose this as one of your three filters if you wrote the Horizontal Half Reflection.
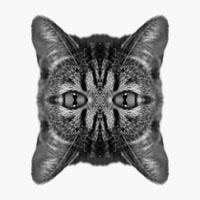
Four Way Reflection (B&W)
Same idea as the Horizontal and Vertical Half Reflections except now you take the upper left quadrant and reflect it onto the other three quadrants.
Lighten (B&W)
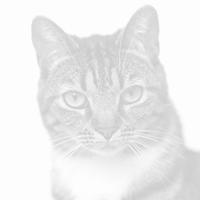
The idea behind this algorithm is to take the current pixel values and move them closer to pure white (255) by moving them a certain percentage of the way toward pure white. The algorithms is outlined below.
Prompt the user to specify a percentage (0 to 100) to lighten the image by. To prompt a user, refer back to GUI Input and Output.
Next, loop through each pixel in the image and lighten the values as follows:
new value = old value + (255 - old value)*(percentage/100.0)
You will need to type cast the new value into a short to store it in the pixel array.
Darken (B&W)
Same idea as Lighten except the formula is a little different. See if you can figure it out on your own.
Monochrome (B&W)
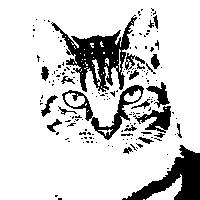
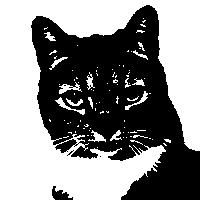
Instead of the usual 256 grayscale pixel values, a monochrome image has only black and white. The algorithm is simple and yields interesting images.
Prompt the user to specify a split point from (0 to 255). To prompt a user, refer back to GUI Input and Output.
Loop through each pixel in the image and use the split point to determine if a pixel should be converted to pure black (0) or pure white (255).
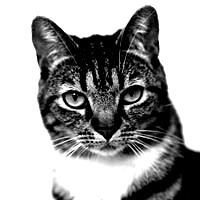
Negative (B&W)
Converting an image to its negative is simple and effective. To convert an image to its negative simply reverse each pixel value using (255) - (current value).
Add Border (B&W)
Make your images classy by adding a border. Here's one way to add a border: Prompt the user for a border width, create a new image array that is larger by 2 border widths, color the entire new image with the border color, then go back in a separate double for-loop and put the original image centered within the new image.
Silver Filter Options
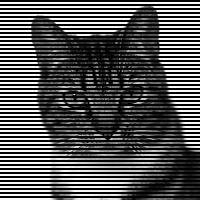
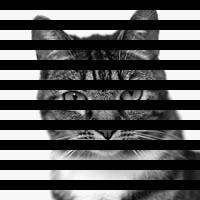
Horizontal Blinds (B&W)
Prompt the user for a blind width and then create black horizontal bars of the given width.
To prompt a user, refer back to GUI Input and Output
Also, instead of using solid black bars, you can darken the pixel values by a given percentage. Here, each blind consists of the original pixel value multiplied by 0.5. The effect is a partially see-through image.

Pixelate (B&W)
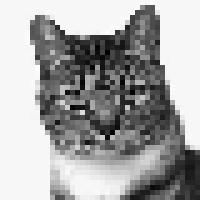
Choose a fixed block size (odd numbers only: 3, 5, 7, etc) and loop through the image stepping by the block size. At each step, fill in surrounding pixels with the center color. For example, if you choose a block size of 3 then you would have 3x3 blocks and step by every 3 pixels through the image. Like this:
At each step, take the center color (e) and fill in the surrounding pixels with the same color:
 becomes
If you think of the 3x3 blocks as being a "circle" then the radius is 1. A 5x5 block pattern would have a radius of 2. In general, a radius of r produces a (2n + 1) by (2n + 1) block pattern. Knowing this only matters if you are going to do the gold version of this filter.
Pixelate Soft (B&W)
Same algorithm as Pixelate except that you fill blocks with the average color value of the surrounding pixels. If you use a pixel radius of 1, you would have 3x3 blocks and take the average of the 9 pixels. If you use a pixel radius of 2, you would have 5x5 blocks and take the average of the 25 pixels. Etc. Compare the results below to the Pixelate algorithm given previously. If you write the normal Pixelate method you may not count this version as a second filter.

Contrast (B&W)
The idea behind increasing or decreasing contrast is to push pixel values either toward middle gray (value 127) to decrease contrast or away from middle gray toward the edges at 0 and 255 to increase contrast.
You may write your own algorithm based on the concept given above or you can follow the outline given below.
- Prompt the user for a double value between 0.0 and 2.0
Go through each pixel in the image and do the following
- Convert the pixel value to a decimal between 0.0 and 1.0 by dividing by 255 (which is the maximum value for a pixel). Make sure to avoid Java integer division by dividing by 255.0 or by type casting to a double.
- Shift the pixel value by -0.5 so the new range becomes zero-centered at [-0.5, 0.5].
- Multiply by the contrast value given by the user.
- Re-center the range by adding 0.5. The range is now back to [0, 1].
- Re-multiply by 255 so the range is back to [0, 255].
Perform clipping to correct pixels that fall outside the [0, 255] range.
if (newValue > 255)
    newValue = 255;

if (newValue < 0)
    newValue = 0;
Set pixel [row][col] to the new value. Since Java math operators convert numbers to ints and doubles you will need to type cast the result into a short in order to store it back in the pixel array. (short)newValue.
Motion Blur (B&W)
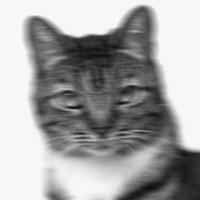
One way to achieve motion blur is to make each each pixel the average of itself plus some of its right or left neighbors. Effectively, this smears pixels in a given direction. For example, the new value for pixel 'a' shown below would be
new value = (a + b + c + d + e + f) / 6
 (Blur radius 5. Pixel 'a' becomes the average of a-f)
Prompt the user for a blur radius and use it to average that many pixels away from each original pixel.
When your loop boundaries get close to the image edge, your program will crash with an ArrayIndexOutOfBoundsException because there aren't enough pixels left to average the full radius amount. To avoid this problem, you should average only the remaining pixels.
Gold Filter Options
Polychrome (B&W)
This filter is a generalization of Monochrome. Instead of splitting an image into 2 colors, split it into any number of colors from 2 to 255. Prompt the user for how many colors to split the image into. Amazingly, even the 4-color image below looks detailed!
Rotation (B&W)
Use trigonometry to rotate the image by a user-specified angle.
Pixelate (B&W)
Generalize both Pixelate algorithms (hard, soft) from the Silver filters by allowing the user to specify a pixel radius. The results are very cool.
Submission Instructions
Once you have 3 new filter classes written, at top of every filter file you created, insert the following comment to indicate:
- Your Name
- Your Period
- The Date
- A description of the filter you are doing.
Name each filter class using the convention PX_LastName_FirstName_FilterName. For example if you were in 3rd period and named Michael Wang and your filter was a vertical flip, then you would name the class P3_Wang_Michael_VerticalFlipBW. This should create a file in the filters folder of your project named P3_Wang_Michael_VerticalFlipBW.java, which is the file you should upload here.
Submit all 3 filter .java files below.
You must Sign In to submit to this assignment